Home Gym Setup Guide for Small Apartments
Share
A home gym fails when it creates friction. Maybe the equipment blocks a doorway. Maybe every workout shakes the floor. Maybe the setup takes 15 minutes before your first set.
This home gym setup guide solves that problem. Build around the space you have, your training goal, and the people below you. Start compact. Choose versatile tools. Leave enough room to actually move.
Start With the Floor Plan, Not the Shopping Cart
Measure your clear training area first. Clear means usable space after furniture, doors, storage bins, and pets are accounted for. For most apartment workouts, a 6-by-8-foot zone is enough for strength, mobility, and conditioning.
Ceiling height matters too. Measure before buying a pull-up bar or planning overhead presses. If your ceiling is under 7 feet, prioritize floor training, resistance bands, push-up variations, and seated pressing.
Place your setup near ventilation if possible. A window, fan, or open doorway makes intense sessions more comfortable. Avoid thick carpet for unstable movements. Use a dense exercise mat over hard floors instead.
Build Your Home Gym Around Three Movements
You do not need a room full of machines. You need tools that let you push, pull, squat, hinge, carry, brace, and recover. A smart starter setup supports several movements from a small footprint.
1. Start With a Training Mat
A quality mat protects floors, reduces vibration, and gives you a defined place to train. It supports bodyweight work, mobility, yoga, core training, and recovery sessions. For upstairs homes, this is your first noise-control purchase.
Recommended training mat specifications:
- Footprint dimensions: 24 by 72 inches unfolded; about 6 by 24 inches when rolled
- Weight capacity: 300-pound user-weight target for bodyweight training
- Resistance type / motor horsepower: Non-resistance surface; no motor
- Noise level assessment: Low. Reduces shoe impact and dumbbell vibration, but does not make dropped weights apartment-safe
2. Add Resistance Bands for Full-Body Strength
Resistance bands provide the highest training return per square foot. They can train rows, presses, squats, deadlifts, glute work, triceps, shoulders, and assisted pull-ups. They also travel easily.
A band setup works especially well when you cannot use heavy dumbbells upstairs. The trade-off is that resistance increases as the band stretches. That can feel different from free weights. Slow reps and a full range of motion make bands highly effective.
Recommended resistance band specifications:
- Footprint dimensions: 48 inches long unfolded; about 12 by 3 inches when folded for storage
- Weight capacity: Not applicable; select bands rated for a combined resistance range of 10 to 150 pounds
- Resistance type / motor horsepower: Elastic resistance; no motor
- Noise level assessment: Very low. Ideal for apartments, early workouts, and shared walls
3. Use a Pull-Up Bar When the Doorframe Allows It
A pull-up bar gives your home gym a true pulling movement. That matters because push-ups and presses are easy to program at home, while strong back training often gets skipped.
Doorframe bars are useful, but they are not universal. Do not force one onto a weak frame, damaged trim, or nonstandard doorway. If you rent, inspect the contact points carefully and follow the product instructions exactly.
Recommended doorway pull-up bar specifications:
- Footprint dimensions: 37 by 10 by 8 inches installed; about 37 by 10 by 3 inches when stored
- Weight capacity: 300 pounds
- Resistance type / motor horsepower: Bodyweight resistance; no motor
- Noise level assessment: Low to moderate. Controlled reps stay quiet, while kipping and jumping create noise and frame stress
4. Choose Adjustable Dumbbells or a Compact Dumbbell Pair
Dumbbells add simple, measurable progression. You can load squats, presses, rows, Romanian deadlifts, carries, and core exercises without changing your whole setup.
For small spaces, adjustable dumbbells are practical. A fixed pair may feel better in hand and change faster during circuits. It depends on whether you value compact storage or faster transitions.
Recommended adjustable dumbbell specifications:
- Footprint dimensions: 16 by 8 by 8 inches per dumbbell in use; 18 by 9 by 10 inches on a storage tray
- Weight capacity: 52.5 pounds per dumbbell
- Resistance type / motor horsepower: Selectorized free-weight resistance; no motor
- Noise level assessment: Moderate. Quiet when controlled; use a mat and never drop them upstairs
5. Add an Ab Roller for Serious Core Training
An ab roller is compact, challenging, and easy to underestimate. It trains anti-extension strength, meaning your trunk resists arching as your arms move away from your body. That carries over to push-ups, presses, squats, and daily movement.
Beginners should use a shortened rollout range. Roll toward a wall if you need a clear stopping point. Keep your ribs down and glutes engaged. If your low back feels the movement more than your abs, reduce the range.
Recommended ab roller specifications:
- Footprint dimensions: 12 by 7 by 7 inches in use; 12 by 7 by 4 inches stored
- Weight capacity: 300 pounds
- Resistance type / motor horsepower: Bodyweight leverage resistance; no motor
- Noise level assessment: Low. Use it on a mat to prevent wheel noise and protect flooring
6. Make Recovery Part of the Setup
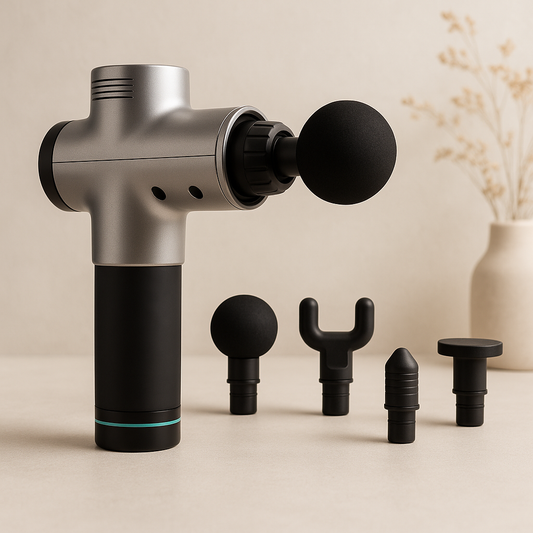
Training consistency depends on recovery. A massage ball, mobility band, or compact neck and shoulder massager can help you maintain a routine when stiffness builds up. These tools do not replace medical care. They do help you spend a few focused minutes on tight hips, feet, upper back, or shoulders.
Recommended massage ball specifications:
- Footprint dimensions: 3 inches in diameter in use; 3 by 3 by 3 inches stored
- Weight capacity: 300 pounds for controlled floor or wall pressure
- Resistance type / motor horsepower: Firm compression surface; no motor
- Noise level assessment: Very low. Suitable for any apartment floor
Control Noise Before It Becomes a Problem
Apartment-friendly training is mostly about exercise choices. Avoid jumping burpees, heavy drops, kipping pull-ups, and uncontrolled kettlebell swings late at night. You can still train hard with tempo squats, split squats, push-ups, rows, carries, dead bugs, and band circuits.
Use a simple rule: if equipment leaves your hands, it should land silently. Put dumbbells down with control. Train on a mat. Keep your workout zone away from shared walls when possible.
A Simple Weekly Home Gym Plan
Train three days each week to start. Perform a squat pattern, push, pull, hinge, core movement, and short mobility finish. Keep each session around 30 to 45 minutes.
For example, use band squats or dumbbell goblet squats, push-ups, band rows or pull-ups, dumbbell Romanian deadlifts, ab rollouts, then a few minutes with a massage ball. Add repetitions first. Add resistance when your form stays sharp.
Virfit equipment can support this kind of compact, repeatable setup across strength, mobility, and recovery. The goal is not more gear. The goal is fewer excuses between you and your next session.
How to Choose Your Setup
Before buying, use this checklist:
- Measure your clear floor area, doorway width, and ceiling height.
- Match equipment to your main goal: strength, mobility, conditioning, or recovery.
- Confirm every product's user-weight rating and installed dimensions.
- Choose low-noise tools if you live upstairs or share walls.
- Favor equipment with multiple uses over single-exercise gadgets.
- Set a storage spot before the equipment arrives.
- Buy enough resistance to progress for at least six months.