How to Prevent Wrist Pain During Workouts
Share
Wrist pain can stop a strong training streak fast. It can also make typing, cooking, driving, and sleeping uncomfortable. Learning how to prevent wrist pain starts with one simple rule: your wrists need strength, mobility, and smart loading - not endless stretching or pushing through pain.
Most wrist discomfort builds over time. A few rushed push-ups, long laptop hours, tight forearms, or a sudden jump in training volume can add up. The good news is that small adjustments often make a real difference.
Why Wrist Pain Shows Up
Your wrist is a compact joint with many moving parts. It connects the hand to the forearm while helping transfer force during gripping, pushing, pulling, and carrying. That makes it useful. It also makes it easy to overload.
Pain often appears when the wrist repeatedly works at its end range. Think of a deep push-up position, a long plank, or holding a heavy barbell with the wrist bent backward. Poor hand placement can make the issue worse.
Desk work creates a different version of the same problem. Hours of gripping a mouse or hovering over a keyboard can leave the forearm muscles tight and fatigued. Then your workout asks those same tissues to do more.
Common contributors include:
- A fast increase in sets, reps, weight, or training frequency
- Weak forearms and poor grip endurance
- Limited shoulder mobility that shifts stress into the wrists
- Poor pressing form or an unstable hand position
- Long periods of repetitive phone, keyboard, or mouse use
- Skipping recovery after high-volume upper-body work
How to Prevent Wrist Pain Before You Train
A good wrist warm-up takes three to five minutes. That is enough to prepare the joint without turning your session into a mobility class.
Start by opening and closing your hands for 20 to 30 reps. Then make slow wrist circles in both directions. Keep the movement controlled. You are looking for smooth range of motion, not aggressive stretching.
Next, move the wrist through flexion and extension. Hold one arm straight. Use the other hand to gently guide the fingers down, then up. Keep each position for about 15 seconds. The stretch should feel mild. Sharp pain is your stop sign.
Finish with a few easy loading drills. Try wall push-ups, light bear-position weight shifts, or fists-down planks from an elevated surface. Start with your hands higher than your feet. This reduces pressure while teaching your wrists to accept load.
Your shoulders matter here too. If your shoulder blades cannot stay stable during a push-up or plank, the wrists often compensate. Add shoulder blade push-ups, band pull-aparts, or controlled rows to your routine. Better upper-body control means less strain below the elbow.
Fix Your Wrist Position During Common Exercises
The wrist should usually stay stacked and neutral. That means it lines up with your forearm instead of collapsing backward, forward, or sideways.
Push-Ups, Planks, and Burpees
Spread your fingers wide. Press through your whole hand, including the base of the index finger and thumb. Do not dump all your weight into the heel of the palm.
Place your hands slightly ahead of your shoulders only when needed for your body position. Keep your elbows from flaring hard to the sides. If full-floor push-ups hurt, raise your hands on a stable surface. You can build strength without forcing painful depth.
A neutral grip option can also help. Holding push-up handles or gripping dumbbells may reduce wrist extension. It depends on the person. Some people prefer it immediately. Others need time to build grip tolerance first.
Dumbbell and Barbell Work
During presses, curls, rows, and carries, keep the knuckles lined up with the forearm. Avoid letting the wrist fold under the load.
Use a weight you can control for every rep. If your wrist drifts on the last three reps, the set is already too heavy for your current capacity. Reduce weight, reduce reps, or use a slower progression.
For front-rack positions, limited wrist mobility is common. Do not force a painful rack position. A crossed-arm variation or a different exercise can let you train your legs while you improve mobility gradually.
Pull-Ups and Hanging Work
Grip the bar firmly without squeezing at maximum effort from the first second. Keep your wrist straight and let the hand sit naturally around the bar.
Build hanging tolerance slowly. Start with short, controlled hangs. Add time only when your hands, forearms, and wrists recover well. High-volume pull-up work can irritate the wrist even when your technique looks solid.
Build Stronger Wrists and Forearms
Mobility helps, but capacity protects you. Strong forearms help the wrist manage force during lifting, sports, and daily tasks.
Train these movements two or three times each week. Keep resistance light at first. Focus on smooth reps and zero sharp pain.
Wrist curls strengthen the palm-side forearm muscles. Reverse wrist curls train the top side. Wrist rotations improve control through turning motions. Light carries build grip endurance while teaching the wrist to stay stacked.
Do not train every movement to failure. Your forearms already work during rows, pulls, deadlifts, curls, and daily gripping. Start with two sets of 10 to 15 controlled reps. Add volume slowly.
Finger extension work is especially useful if you spend hours gripping. Open your fingers against light resistance, then return slowly. This gives the muscles on the back of the forearm more attention and can balance repetitive gripping demands.
Manage Training Load Instead of Chasing Pain
Wrist pain often appears after a volume spike. Maybe you added boxing, pull-ups, push-ups, and heavy pressing in the same week. Each movement seems manageable alone. Together, they exceed what your tissues can recover from.
Change one variable at a time. Add reps, weight, sets, or workout days gradually. Do not raise all four at once.
Use a simple discomfort scale. Mild stiffness that fades during a warm-up may be manageable. Pain that increases set by set is a signal to adjust. Pain that lingers into the next day means your last session likely exceeded your current tolerance.
A useful short-term adjustment is reducing the aggravating movement while keeping the rest of your training active. Replace floor push-ups with elevated push-ups. Swap a painful barbell exercise for a neutral-grip variation. Train lower body, walking, mobility, and pain-free pulling while the wrist settles.
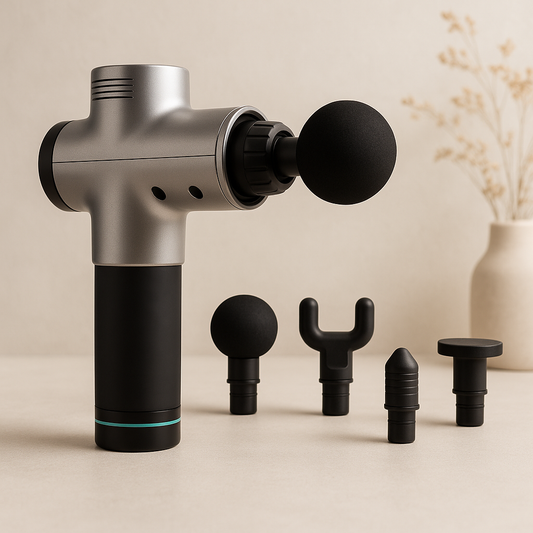
Recovery is part of progression. Sleep, protein, hydration, and rest days support tissue repair. A brief forearm self-massage can feel helpful after repetitive work, but it cannot replace better form or a smarter training plan.
Protect Your Wrists Outside the Gym
Your workout is not the only load your wrists carry. Laptop work, gaming, scrolling, manual labor, and long commutes can all affect how your wrists feel under a bar or on the floor.
Set up your keyboard so your wrists stay close to neutral. Keep your mouse close enough that you do not reach from the shoulder. Take short movement breaks every 30 to 60 minutes. Open and close your hands, rotate the wrists, and relax your grip.
Pay attention to your phone habits too. Holding a phone for long periods with the wrist bent and thumb working nonstop can irritate the same area you load in training. Alternate hands and take breaks when possible.
How to Choose Support Without Becoming Dependent
Wrist wraps and braces can provide confidence during certain lifts or short-term flare-ups. They are not a substitute for strength, technique, or appropriate loading. Use support strategically, not automatically.
Choose a support option based on the activity. Stiffer support may help during heavy pressing, but it can limit movement for mobility drills or everyday tasks. A softer option may offer light compression without changing your natural motion as much.
Before buying any wrist support, check these practical details:
- It fits your wrist circumference without numbness or finger tingling.
- It allows the grip and range of motion your activity requires.
- It uses adjustable closure rather than relying on one fixed tightness.
- It feels stable during a light test set, not only when standing still.
- It supports a specific need instead of hiding pain during every workout.