Cómo usar correctamente el equipo de gimnasio en casa
Compartir
Gran parte del equipo para el hogar no se utiliza por una razón: la gente compra herramientas antes de saber cómo usar el equipo de gimnasio en casa para su espacio, sus objetivos y su nivel de forma física. La solución es sencilla. Combina cada herramienta con un patrón de movimiento, configúrala correctamente y entrena con control desde el primer día.
Cómo usar el equipo de gimnasio en casa sin desperdiciar entrenamientos
La mejor configuración para el hogar no es la más grande. Es la que puedes usar constantemente. Eso importa aún más si entrenas en un dormitorio de invitados, un apartamento o un espacio en el piso de arriba.
Empieza pensando en movimientos, no en productos. Necesitas empujar, tirar, hacer sentadillas o bisagras, trabajo de core y apoyo para la recuperación. Una vez que cada pieza de equipo tenga una función, tus entrenamientos serán más sencillos y efectivos.
También ayuda respetar los límites del entrenamiento en casa. El equipo pesado puede ser ruidoso. Las máquinas grandes pueden dominar una habitación. Algunas herramientas parecen aptas para principiantes, pero castigan rápidamente una mala forma. Por eso la configuración, la carga y el control importan tanto como el equipo en sí.
Bandas de resistencia: el lugar más fácil para empezar
Las bandas de resistencia son una de las herramientas más prácticas tanto para principiantes como para usuarios experimentados. Sirven para remos, prensas, sentadillas, curls, trabajo de glúteos, ejercicios de movilidad y calentamientos. También son ideales si tienes techos bajos o necesitas entrenar en silencio.
Usa las bandas controlando ambas direcciones del movimiento. La mayoría de la gente se enfoca solo en la fase de tracción. La fase de retorno importa tanto como la de tracción. Mantén la tensión en todo el rango, muévete lentamente y evita que la banda te tire hacia atrás.
Para prensas y remos, ancla la banda de forma segura a la altura del pecho. Para sentadillas, párate de manera uniforme sobre la banda y mantén las costillas apiladas sobre las caderas. Para puentes de glúteos o caminatas laterales, coloca la banda donde cree tensión sin que se enrolle o pellizque.
Especificaciones técnicas a verificar:
- Dimensiones: plegadas 8 x 8 x 2 pulgadas, longitud de trabajo desplegadas normalmente 48-82 pulgadas dependiendo del estilo de la banda
- Capacidad de peso: limitada por el usuario, no por la estructura, pero los anclajes deben soportar típicamente entre 300 y 500 libras
- Tipo de resistencia / Potencia del motor: resistencia elástica, a menudo 10-150 libras combinadas según el juego
- Evaluación del nivel de ruido: muy silencioso, excelente para apartamentos y uso en pisos superiores
Barras de dominadas para puerta: potentes, pero la configuración es importante
Una barra de dominadas para puerta es excelente para la fuerza de la espalda, el agarre, el trabajo de core colgado y las progresiones de peso corporal. También es una de las formas más fáciles de añadir tracción vertical sin ocupar espacio en el suelo.
El error principal es una mala instalación. Antes de tu primera repetición, confirma que el ancho de la puerta, la profundidad del marco y los puntos de contacto coincidan con el diseño de la barra. Si no encaja, no la uses. Ningún entrenamiento vale un marco dañado o una barra inestable.
Si aún no puedes hacer dominadas completas, comienza con agarres muertos, jalones escapulares y repeticiones asistidas por banda. Concéntrate en un agarre completo, hombros hacia abajo y control suave. No te balancees durante las repeticiones a menos que estés entrenando esa habilidad a propósito.
Especificaciones técnicas a verificar:
- Dimensiones de huella: plegada o guardada aproximadamente 38 x 12 x 3 pulgadas, ancho instalado generalmente 24-36 pulgadas a través de marcos de puertas estándar
- Capacidad de peso: comúnmente 220-300 libras según el diseño
- Tipo de resistencia / Potencia del motor: resistencia del peso corporal
- Evaluación del nivel de ruido: bajo a moderado, silencioso cuando se ajusta correctamente, más ruidoso si está suelto o se usa con movimiento de impulso
Rodillos abdominales: herramienta pequeña, gran demanda
El rodillo abdominal parece sencillo. No lo es. Entrena la fuerza antiextensión, lo que significa que tu core resiste que tu espalda baja se arquee a medida que te desplazas hacia adelante. Eso lo hace efectivo, pero solo si te ganas el rango.
Empieza de rodillas. Contrae tus abdominales antes de moverte. Aprieta los glúteos. Rueda solo hasta donde puedas sin que tus caderas bajen. Si tu espalda baja siente la tensión antes que tus abdominales, tu rango es demasiado largo.
Esta herramienta funciona mejor en series de pocas repeticiones con una forma limpia. Piensa en 5-10 repeticiones controladas, no en un trabajo descuidado hasta el fallo. Usa una esterilla debajo de las rodillas si entrenas en suelos de madera o alfombras finas.
Especificaciones técnicas a verificar:
- Dimensiones: guardado aproximadamente 12 x 8 x 8 pulgadas, espacio de uso desplegado aproximadamente 24-72 pulgadas dependiendo del rango de extensión
- Capacidad de peso: comúnmente 250-350 libras
- Tipo de resistencia / Potencia del motor: resistencia del peso corporal con deslizamiento asistido por rueda
- Evaluación del nivel de ruido: bajo, generalmente apto para apartamentos en alfombras, moderado en suelos duros
Mancuernas ajustables: lo mejor para la progresión
Si quieres la mayor variedad de ejercicios con una sola pieza de equipo, las mancuernas ajustables son difíciles de superar. Puedes entrenar prensas, remos, sentadillas con copa, peso muerto rumano, zancadas, cargadas y curls sin llenar la habitación con pesas fijas.
Para usarlas bien, elige la carga adecuada para el movimiento. El peso de tus sentadillas o bisagras suele ser mayor que el de tus prensas de hombros o curls. Ajustar demasiado peso demasiado pronto convierte el entrenamiento en casa en un entrenamiento de impulso.
Date suficiente espacio en el suelo. Si entrenas en un piso superior, baja los pesos con control. Dejar caer las mancuernas es duro para los suelos, ruidoso para los vecinos y perjudicial para el propio equipo.
Especificaciones técnicas a verificar:
- Dimensiones de la huella: almacenado en bandeja aproximadamente 16 x 8 x 9 pulgadas por mancuerna, espacio de uso desplegado aproximadamente 6 x 6 pies para la mayoría de los ejercicios
- Capacidad de peso: comúnmente 25-90 libras por mancuerna dependiendo del sistema
- Tipo de resistencia / Potencia del motor: resistencia de peso libre cargado con placas o ajustado con dial
- Evaluación del nivel de ruido: bajo a moderado, silencioso con uso controlado, ruidoso si se deja caer con fuerza sobre suelos duros
Entrenadores de boxeo: cardio sin una máquina gigante
Un entrenador de boxeo es una opción inteligente si quieres acondicionamiento, coordinación y alivio del estrés en una configuración compacta. Puede funcionar bien en habitaciones pequeñas donde una cinta de correr o una bicicleta se sienten demasiado voluminosas.
Úsalo para asaltos cronometrados, no para golpes aleatorios. Comienza con asaltos de 30-60 segundos. Mantén las manos en alto, gira las caderas y mantente ligero sobre los pies. Los asaltos cortos con golpes limpios son mejores que los asaltos largos con una postura descuidada.
El ruido depende de la base, el suelo y la intensidad del golpe. Si vives en un piso superior, usa una colchoneta de ejercicio debajo de la base y evita las sesiones a plena potencia temprano o tarde en el día.
Especificaciones técnicas a verificar:
- Dimensiones de la huella: la base suele tener 20-24 pulgadas de ancho, la altura desplegada suele ser de 48-65 pulgadas
- Capacidad de peso: la capacidad de llenado de la base suele ser de 100-180 libras con agua o arena
- Tipo de resistencia / Potencia del motor: resorte de rebote o resistencia de vástago flexible
- Evaluación del nivel de ruido: moderado, aceptable en apartamentos con alfombras y golpes controlados, menos ideal para uso nocturno
Las herramientas de recuperación también cuentan como equipo
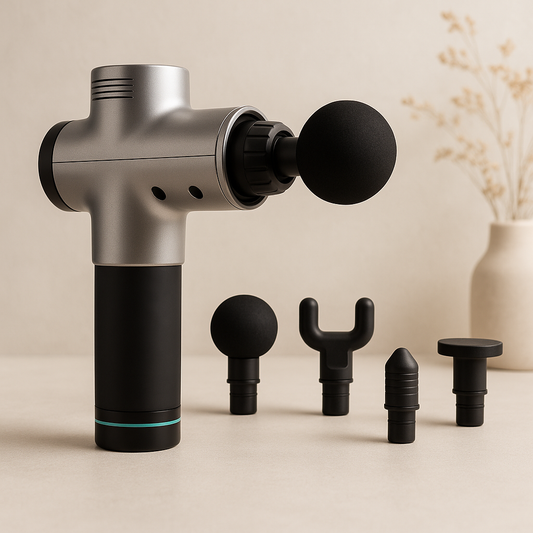
Si entrenas duro y te saltas la recuperación, tu progreso se ralentiza. Las pelotas de masaje, las herramientas de movilidad y los equipos de soporte te ayudan a mantenerte constante. No reemplazan el sueño, la nutrición o una buena programación. Sin embargo, te ayudan a moverte mejor entre sesiones.
Usa una pelota de masaje en pantorrillas, glúteos, parte superior de la espalda o plantas de los pies tensos. Trabaja lentamente. Si contienes la respiración, la presión probablemente sea demasiado agresiva. Las rodilleras y el equipo de soporte deben añadir confianza y estabilidad, no convertirse en un apoyo para el dolor evitable.
Especificaciones técnicas a verificar:
- Dimensiones de la huella: las pelotas de masaje suelen tener entre 2.5 y 5 pulgadas de diámetro, las abrazaderas se pliegan en cajones pequeños o bolsas de gimnasio
- Capacidad de peso: no suele estar clasificada, depende del usuario
- Tipo de resistencia / Potencia del motor: presión manual o soporte de compresión
- Evaluación del nivel de ruido: silencioso, ideal para espacios compartidos y recuperación a cualquier hora
Una forma sencilla de organizar entrenamientos con tu equipo
La forma más fácil de utilizar el equipo de casa es organizarlo en sesiones de cuerpo completo. Una sesión podría usar mancuernas para sentadillas, bandas para remos, flexiones o prensas para empuje de la parte superior del cuerpo, un rodillo abdominal para el core y una pelota de masaje después del entrenamiento. Otra podría centrarse en una barra de dominadas, sentadillas divididas, jalones faciales con banda y asaltos de boxeo.
Mantén la estructura simple. Comienza con un movimiento de la parte inferior del cuerpo, un empuje de la parte superior del cuerpo, un tirón de la parte superior del cuerpo, un movimiento del core y una pieza de acondicionamiento o recuperación. Eso es suficiente para la mayoría de las personas que entrenan de tres a cuatro días a la semana.
Si el espacio es reducido, opta por equipos que se guarden rápido y que sirvan para más de una cosa. Si el ruido es un problema, prioriza bandas, herramientas de peso corporal, colchonetas y equipo de recuperación. Si el objetivo es progresar, añade primero la carga ajustable.
Cómo elegir el equipo adecuado para tu hogar
Utiliza esta lista de verificación antes de comprar o actualizar:
- Mide primero tu área de entrenamiento, la altura del techo y el ancho del marco de la puerta
- Verifica la tolerancia al ruido si vives en un piso superior o compartes paredes
- Elige el equipo que apoye tu objetivo principal: fuerza, cardio, core o recuperación
- Busca herramientas con múltiples usos de ejercicio, no trucos de un solo propósito
- Confirma la capacidad de peso y la seguridad del anclaje antes de cada sesión
- Elige equipos que puedas guardar fácilmente, o los usarás menos
- Comienza con una o dos piezas que usarás semanalmente
- Agrega más solo después de que tu rutina sea consistente
El enfoque de Virfit funciona mejor aquí: entrena de forma más inteligente, recupérate mejor y construye en torno a lo que se adapta a la vida real. El mejor equipo es el que puedes usar de forma segura en tu semana más ocupada, en tu espacio real, sin perder la motivación. Empieza por ahí, y tu configuración seguirá dándote beneficios.